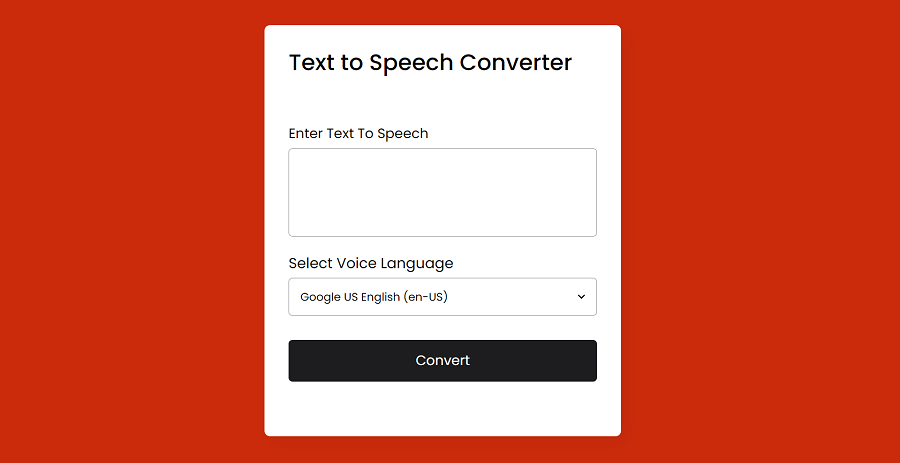
In our tutorial, we have explained how to build a HTML to PDF Converter using JavaScript. In this tutorial, we will explain, how to Build a Text to Speech Converter using JavaScript.
A Text to Speech conversion is a functionality of a web application to allow user’s to type text to convert into desired language speech when click a button. Here will use SpeechSynthesis (Text-to-Speech) Web Speech API.
The SpeechSynthesis Web Speech API enabled to convert text into spoken words to develop interactive and engaging web applications.
So here in this tutorial, we will develop a Text to Speech Converter web application using JavaScript, HTML and CSS.

So let’s proceed with developing application. The file structure are:
- text-speech-converter
- index.html
- js
- speech.js
- css
- style.css
1. Create HTML for Text to Speech Converter
First we will create a HTML file index.html and create HTML for our converter. We will use textarea to allow user enter text to convert to speech and also a dropdown list of supprted speech languages to select to convert. We will have a button on page to click to convert entered text and play.
<div class="wrapper">
  <header>Text to Speech Converter</header>
  <form action="#">
	<div class="row" id="errorMessage"></div>
	<div class="row">
	  <label>Enter Text To Speech</label>
	  <textarea></textarea>
	</div>
	<div class="row">
	  <label>Select Voice Language</label>
	  <div class="voiceLang">
		<select></select>
	  </div>
	</div>
	<button>Convert</button>
	<br><br>
  </form>
</div>
2. Implement Text to Speech Conversion with JavaScript
We will create a js directory and create a javascript file speech.js. We will use SpeechSynthesis Web Speech API to implement text to speech conversion with API functions on button click.
So first we will create object of speechSynthesis API.
let speechSynth = speechSynthesis,
We will also create object of selectors to use further in our code.
const textarea = document.querySelector("textarea"),
voicesList = document.querySelector("select"),
speechConverter = document.querySelector("button");
errorMessage = document.getElementById("errorMessage");
Then we will create function voiceLang() to list voices language using API.
function voiceLang(){
    for(let voice of speechSynth.getVoices()){
        let selected = voice.name === "Google US English" ? "selected" : "";
        let option = `<option value="${voice.name}" ${selected}>${voice.name} (${voice.lang})</option>`;
        voicesList.insertAdjacentHTML("beforeend", option);
    }
}
We will also create function convertTextToSpeech() and implement text to specch conversion functionality. We will call it on voiceschanged event of API.
function convertTextToSpeech(text){
    let speechUtterance = new SpeechSynthesisUtterance(text);
    for(let voice of speechSynth.getVoices()){
        if(voice.name === voicesList.value){
            speechUtterance.voice = voice;
        }
    }
    speechSynth.speak(speechUtterance);
}

speechSynth.addEventListener("voiceschanged", voiceLang);
Then we will handle button click handler and handle text to speech conversion.
speechConverter.addEventListener("click", e =>{
    e.preventDefault();
    if(textarea.value !== ""){
		errorMessage.innerText = "";
        if(!speechSynth.speaking){
            convertTextToSpeech(textarea.value);
        }
        if(textarea.value.length > 5){
            setInterval(()=>{
                if(!speechSynth.speaking && !isTextSpeaking){
                    isTextSpeaking = true;
                    speechConverter.innerText = "Speech";
                }else{
                }
            }, 500);
            if(isTextSpeaking){
                speechSynth.resume();
                isTextSpeaking = false;
                speechConverter.innerText = "Pause Speech";
            }else{
                speechSynth.pause();
                isTextSpeaking = true;
                speechConverter.innerText = "Resume Speech";
            }
        }else{
            speechConverter.innerText = "Speech";
        }
    } else {
		errorMessage.innerText = "Please enter text to speech.";
	}
});
3. Styling Converter Page
Now finally, we will our converter page. We will create a css directory and create a file style.css. Then we will write CSS to style our page.
@import url('https://fonts.googleapis.com/css2?family=Poppins:wght@400;500;600;700&display=swap');
*{
  margin: 0;
  padding: 0;
  box-sizing: border-box;
  font-family: 'Poppins', sans-serif;
}
body{
  display: flex;
  align-items: center;
  justify-content: center;
  min-height: 100vh;
  background-image: linear-gradient(90deg, #161578, #3c10b8);
}
::selection{
  color: #fff;
  background: #5256AD;
}
.wrapper{
  padding: 25px 30px;
  border-radius: 7px;
  background: #fff;
  box-shadow: 7px 7px 20px rgba(0,0,0,0.05);
}
.wrapper header{
  font-size: 28px;
  font-weight: 500;

}
.wrapper form{
  margin: 35px 0 20px;
}
form .row{
  display: flex;
  margin-bottom: 20px;
  flex-direction: column;
}
form .row label{
  font-size: 18px;
  margin-bottom: 5px;
}
form .row:nth-child(2) label{
  font-size: 17px;
}
form :where(textarea, select, button){
  outline: none;
  width: 100%;
  height: 100%;
  border: none;
  border-radius: 5px;
}
form .row textarea{
  resize: none;
  height: 110px;
  font-size: 15px;
  padding: 8px 10px;
  border: 1px solid #999;
}
form .row textarea::-webkit-scrollbar{
  width: 0px;
}
form .row .voiceLang{
  height: 47px;
  display: flex;
  padding: 0 10px;
  align-items: center;
  border-radius: 5px;
  justify-content: center;
  border: 1px solid #999;
}
form .row select{
  font-size: 14px;
  background: none;
}
form .row select::-webkit-scrollbar{
  width: 8px;
}
form .row select::-webkit-scrollbar-track{
  background: #fff;
}
form .row select::-webkit-scrollbar-thumb{
  background: #888;
  border-radius: 8px;
  border-right: 2px solid #ffffff;
}
form button{
  height: 52px;
  color: #fff;
  font-size: 17px;
  cursor: pointer;
  margin-top: 10px;
  background: #675AFE;
  transition: 0.3s ease;
}
form button:hover{
  background: #4534fe;
}

@media(max-width: 400px){
  .wrapper{
    max-width: 345px;
    width: 100%;
  }
}
You can view the live demo from the Demo link and can download the complete project files from the Download link below.
