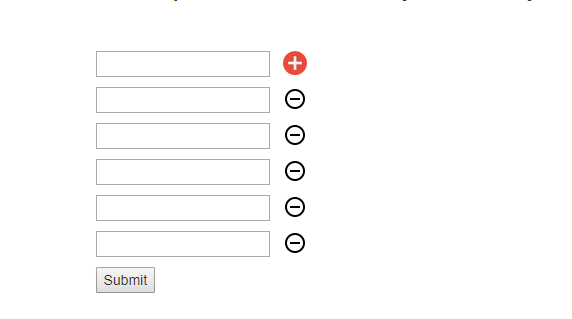
Add and remove dynamic input fields is an important feature of web applications. It allows user friendly feature to add and remove form input dynamically to increases user experience. If you’re developing a web application wants to add this feature then you’re here at right place.
In this tutorial you will learn how to add and remove form input fields dynamically using jQuery.
You will also learn to handle dynamically added fields value saves in database using PHP. The tutorial covered in very easy steps with live Demo and complete source code to download.
Also, read:
- Load Dynamic Content in Bootstrap Popover with Ajax, PHP & MySQL
- Create Dynamic Bootstrap Tabs with PHP & MySQL
- Bootstrap Contact Form with Captcha using Ajax and PHP
- Multi Select Dropdown with Checkbox using Bootstrap, jQuery and PHP

So let’s start the coding. We will have following file structure for this tutorial.
- index.php
- add_fields.js
- form_post.php
Steps1: Create Form with Add Field Buuton
In index.php, we will Form HTML add field button to add fields dynamically.
<form action="post_form.php" method="post">
<div class="field_wrapper">
<div>
<input type="text" name="input_field[]" value=""/>
<a href="javascript:void(0);" class="add_input_button"
title="Add field"><img src="add-icon.png"/></a>
</div>
</div>
<input type="submit" name="save" value="Submit"/>
</form>
Steps2: JavaScript to Form Input Fields Dynamically
In add_fields.js , we will handle functionality to add input fields dynamically on button click. Also handle functionality to remove added input fields.
$(document).ready(function(){
var max_fields = 10;
var add_input_button = $('.add_input_button');
var field_wrapper = $('.field_wrapper');
var new_field_html = '<div><input type="text"
name="input_field[]" value=""/><a href="javascript:void(0);"
class="remove_input_button"
title="Remove field"><img src="remove-icon.png"/></a></div>';
var input_count = 1;
// Add button dynamically
$(add_input_button).click(function(){
if(input_count < max_fields){
input_count++;
$(field_wrapper).append(new_field_html);
}
});
// Remove dynamically added button
$(field_wrapper).on('click', '.remove_input_button', function(e){
e.preventDefault();
$(this).parent('div').remove();
input_count--;
});
});
Steps3: Handle From Submit Value At Server End
Now finally in form_post.php, we will handle form submit input field value using PHP. You can add functionality to save Form values to database.
<?php
if(isset($_REQUEST['input_field'])){
print '<pre>';
print_r($_REQUEST['input_field']);
print '</pre>';
}
?>
You may also like:
- Working with php.ini file Configuration
- Control Statements in PHP
- Convert Associative Array into XML in PHP
- Convert XML into Associative Array in PHP
- Using Prepared Statement with PHP & MySQL
- How to Upload File in PHP
- Converting an Array to JSON in PHP
- Converting JSON to Array or Object in PHP
- Manipulating PHP arrays: push, pop, shift, unshift
- Remove Repeated Words From String in PHP
- Converting a PHP Array to a Query String
- 15+ regular expressions for PHP developers
- 10 Most Important Directory Functions in PHP
- 10 little known but useful PHP functions
- PHP Script to Download Large Files Reliably
You can view the live demo from the Demo link and can download the script from the Download link below.
Demo Download
awesome work sir.
good script thank you.
how can put numbering of fields
You can do changes as per needs. you can provide your code add this. thanks!